
Are you annoyed with your old & rusted kitchen sink faucet? Well, replacing the faucet is an easy solution! Kitchen faucets can sometimes be quite tricky to change, it may cost you a lot of your valuable time if you don’t know how to remove an old kitchen faucet.
Gone are the days when you have to spend a whole day replacing a mere faucet, because our tutorial will guide you through the easiest way of removing an old faucet. So without further ado, let’s start—
Table of Contents
How To Remove An Old Kitchen Faucet
Replacing the kitchen faucet is a common scenario when it’s not working or you’re planning to upgrade the kitchen. The removing procedure can be kind of different depending on how the faucet is attached. Some faucets are attached to the kitchen wall where some are attached to the sink.
Anyways, we have tried to elaborate a foolproof method of removing the faucet after years of experience. But before getting into the tutorial, let’s check out the necessary tools & supplies you’ll need—
Required Tools & Supplies
In order to replace your old kitchen faucet, you’ll definitely need some wrenches. A basin wrench & an adjustable wrench will work just fine to remove & reinstall the faucet.
Also, a putty or utility knife will come in handy to remove the caulk or putty around the base of the faucet.
You’ll need some accessory tools to facilitate the procedure even more. For example, a screwdriver, some penetrating oil will be of great use when you’re removing the faucet.
Anyways, if you’re planning to replace your old faucet with a new one, you’ll definitely need a new faucet. Plus, keeping some putty within reach will be a great help.
Make sure to keep these all ready before starting to work, it’s not wise to bustle over finding anything when you’re in the middle of the process.
Now that you’ve known about the necessary tools, let’s get into the tutorial—
Turn Off The Water Supply
Once you’ve got all the elements in your hands, the first step will be closing the water supply line! You can’t replace a faucet with water splattering all over your kitchen, make a smart move by turning off the line from the bottom.
Find the valve or knob that controls the water supply to your kitchen & shut it off. You may have to use a wrench to rotate the knob/valve, but most of the time, you can turn off the line with just your hands.
Now, there might be another situation, and that is, the water line to your kitchen doesn’t have any valve or knob at all! In that case, you have to shut off the central water supply to the house. You can easily find the main water supply valve in your basement.
Disconnect The Supply Pipes
The next step is disconnecting the supply pipes of your faucets. Depending on the number of handles on your kitchen faucet, it may have different numbers of supply pipes.
If your old faucet is a single-handle faucet, it will have only one supply pipe where a double handle faucet will have two supply pipes to supply hot & cold water respectively.
Take your adjustable wrench & loosen up the fasteners that connect the supply pipe with the waterline. This may take some time, continue to loosen up the fasteners until the supply pipes are free.
Remove The Mounting Screws Or Nuts
Your old faucet is definitely attached to its base with some fasteners like nuts or screws. Given the fact that the faucet has been used for a very long time, it might be difficult to remove the nuts or screws. So you have to be tricky in this step.
Depending on the type of your faucet, it might be attached differently, to the wall or countertop. So you’ll have to follow different strategies for this step.
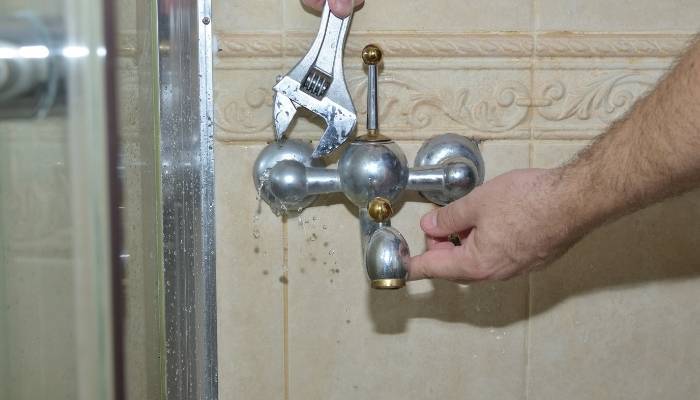
In the case of a wall mounted faucet, you’ll see a nut at its base, use your basin wrench to loosen up the nut. If the faucet is a double handle faucet, remove the nut from both of the bases.
If the nuts are stuck too tightly, use some penetrating oil. Spray or apply the oil and leave it for 15 minutes. Then you can easily loosen the nuts.
Anyways, in the case of a sink or countertop mounted faucet, look under the countertop to find the base of the faucet. You’ll notice there are some nuts or screws that have held the faucet firmly.
Again, use your basin wrench to remove the nuts. In order to loosen these nuts, you have to rotate the nuts in an anti-clockwise direction. Use penetrating oil to the stubbornly attached nuts.
Remove The Faucet
We’re now on the final step of this tutorial. Once you finish all of the steps above, you should be able to pull out the faucet easily. Gently pull the faucet & try to take it out. Remove the putty using the putty knife around the base if it’s still stuck to the bottom.
If the faucet is a double handle one, it will be a little more tricky to remove. Most of the double handle faucets are actually a combination of several faucet pieces, you can easily take them apart by using your basin wrench.
Loosen up the nuts between the pieces and separate them using a hammer. Then pull out the pieces gently. After you successfully remove the faucet, you are done! If you intend to install a new faucet, make sure to do it instantly.
If you’re also looking for a tutorial on installing a new faucet, we also have a tutorial on that too. Check our website to find the tutorial!
Wrapping It Up
That’s the end of our tutorial on how to remove an old kitchen faucet. Get rid of your rusty & leaky faucet and sleep peacefully with no dripping noises! I hope this tutorial has guided you well, don’t hesitate to ask any questions if you have trouble removing your faucet. Happy plumbing!