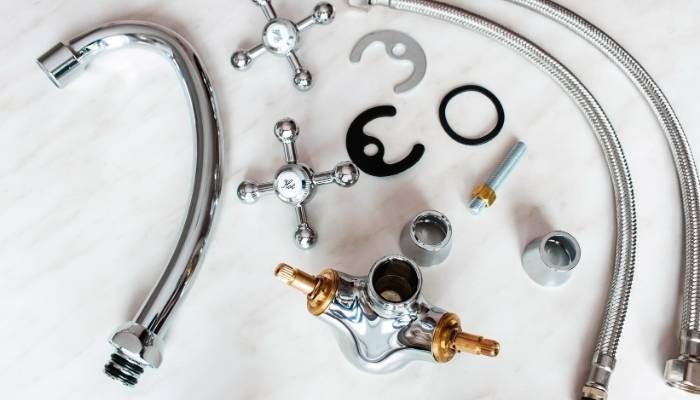
A kitchen faucet is a valuable kitchen tool that all of us use in our everyday life. But consistent use of the faucet can cause some major troubles in its performance. Now if you start facing issues with your leaky kitchen faucet of Moen, you need to repair it urgently. But an expert plumber is not affordable for many of us. In that case, you have to play the role of an emergency plumber. But what if you have little knowledge on how to disassemble a Moen kitchen faucet?
In this guide, we will show you the most effective method to take apart the kitchen faucet. It is obvious that Moen produces a wide range of kitchen faucets with different features. But nearly all Moen kitchen faucets are similar in design and functionalities. So it is relatively easy to disassemble this type of faucet. Let’s get started:
Table of Contents
How To Disassemble A Moen Kitchen Faucet
The disassembling process of the Moen faucet includes some major steps that you need to follow initially.
Gather Necessary Tools
Removing different parts of the Moen kitchen faucet is pretty simple. In fact, you don’t require so many tools to complete the tasks. Here is the list of several tools that you need:
-
Screwdriver
-
Wrench
-
Needle nose pliers
Turn Off Water
First of all, find out the water supply under the sink. Turn it off before you proceed with the main steps. If the Moen kitchen faucet has more than one water supply for hot and cold water, shut down both of them.
Drain The Pipes
Secondly, open the Moen faucet and drain out the remaining water inside the pipes. Because if there is any water during the disassembling, it may hamper your work.
Remove The Handle
Next, your responsibility is to remove the faucet handle. Use a flat screwdriver and start taking apart the handle. After turning for a while with the screwdriver, the handle will get loose to remove. Also, you will find a set of screws that are connecting the handle to the faucet. Then, use a wrench to loosen those screws. And, the handle will pull out easily.
If the Moen kitchen faucet has double handles, you have to loosen both of them.
Withdraw The Dome And Plastic Sleeve
Now it’s time to remove the dome and plastic sleeve. After getting rid of the handle, you will find the dome. It will slide out simply without any issue. After that, locate the black jacket inside. Use the wrench to turn it anti-clockwise for its removal.
Remove The Handle Mechanism
A handle mechanism is available inside to control the flow out of water from the kitchen faucet.
Anyway, you will find a screw that does the job of holding this mechanism altogether. After removing the black plastic sleeve, unscrew the mechanism with your flat-head screwdriver.
Get Rid Of The Ring And Washer
There is a white ring under the handle mechanism inside the faucet body. In fact, it comes off easily. So try to remove it without putting on much pressure. Also, precaution is necessary so that you can fix it back easily later on. Next, you will find a washer as well. Use the wrench to remove it swiftly.
Remove The Spout
After removing both the ring and washer, now turn your attention to the spout. You can remove it without even using any tool. Once you get rid of it, you will find a clip that holds the cartridge. Use the screwdriver to remove it comfortably.
Pull Out The Cartridge
Finally, it’s time to pull out the entire cartridge. In particular, the needle nose clip with pliers will come in handy in this step. Hold the stem with pliers and twist in various directions until it comes off. However, sometimes the pliers don’t work effectively to tear off the cartridge stem. Thus, we recommend using a cartridge puller.
Final Words
Disassembling the entire Moen kitchen faucet might often seem a hard task to do. But trust me, it isn’t. For your convenience, we have come up with this guide on how to disassemble a Moen kitchen faucet.
Now you can be confident enough to complete the kitchen faucet repair project on your own. For a little hard work, you can get a trouble-free kitchen faucet without even paying a plumber. So it’s time to make your hard work well worth the trouble. Good luck!

